

Worked Examples
6 Worked Examples
Section titled “6 Worked Examples”The following section contains some worked examples. These examples are used as the basis for the worked examples in the Dashboards. Access to Ingenuity Hub within your subscription is required for all of these examples as they must be created as a Datasource Template first.
6.1 UK Postcode Finder
Section titled “6.1 UK Postcode Finder”The https://api.postcodes.io/api is an open API for finding information about UK postcodes.
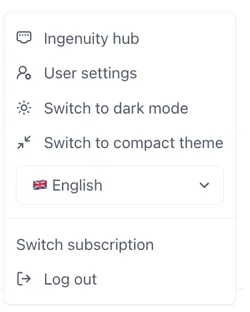
Access Ingenuity Hub by clicking on your user in the bottom left corner and selecting “Ingenuity Hub”
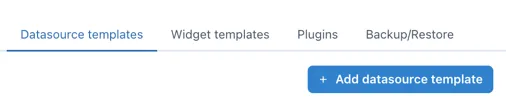
Go to the “Datasource templates” tab and click the [Add datasource template] button:
A new blank data source form will open including an template for configuring the data source.
6.1.1 Enter the metadata
Section titled “6.1.1 Enter the metadata”Enter the following data at the top of the form:
Name: Postcode Info
nameID: postcodes
Description: Use the docs from the API to put together a useful description for users:
Search the web for a suitable logo and upload it.
6.1.2 Configure the data source
Section titled “6.1.2 Configure the data source”From the docs we see that the structure of a request is
https://api.postcodes.io/postcodes/postcodeThe request can be a GET or a POST. We will use the GET method to keep it simple here.
Therefore, the first two lines of the datasource are:
"url": "https://api.postcodes.io/postcodes/{{postcode}}","type": "GET",6.1.3 Configure the inputs
Section titled “6.1.3 Configure the inputs”The only input is the postcode we want to retrieve data for. The default template has two inputs. Delete the second one (don’t forget to delete the comma after the first one) and configure the remaining input as follows:
"inputs": [ { "name": "postcode", "type": "url", "label": "Postcode", "isHidden": false, "isRequired": true, "description": "The postcode to get information about", "isConfigurable": false }],6.1.4 Configuring the outputs
Section titled “6.1.4 Configuring the outputs”The outputs are configured in the output section and as a minimum require a “name” and “path”.
"output": { "paths": []}The path is the json path expression to extract the data from the API response
With the inputs set, we can now use the Test button in the Preview section to check the response from the API. Enter a postcode (e.g. W12 7FW) and click Test. You should see the following in the Response window:
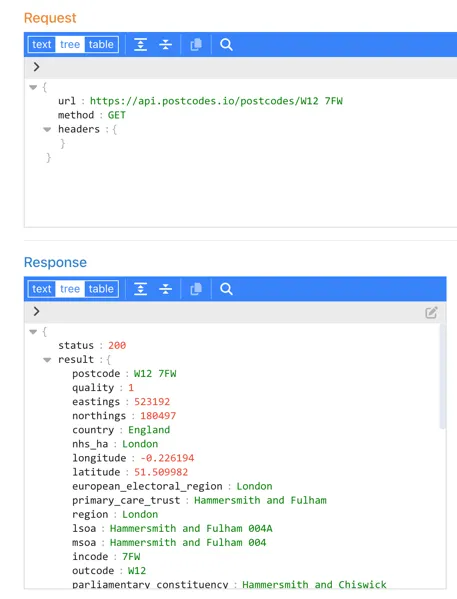
Explore the response to find the data you would like. For the purpose of this example, we are going to return the latitude and longitude, region, district and parliamentary constituency.
The default template only has one output, so we will need to copy this several times. Don’t forget to add the comma (,) at the end of each output except the last one.
The minimum configuration required for the outputs section is therefore:
"output": { "paths": [ { "name": "Postcode", "path": "$.result.postcode" }, { "name": "Region", "path": "$.result.region" }, { "name": "District", "path": "$.result.admin_district" }, { "name": "Latitude", "path": "$.result.latitude" }, { "name": "Longitude", "path": "$.result.longitude" }, { "name": "Constituency", "path": "$.result.parliamentary_constituency_2024" } ]},If we leave it like this the data source will work but it is not very user friendly as, if a user clicks on the “Details” button by the data source this is what they will see:
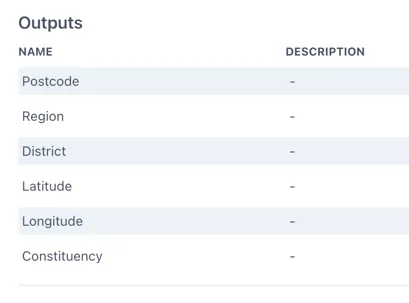
It is a good idea to add a description to each output so that it shows up in the information about the data source for a user. Information on all the outputs can be found in the API docs here: https://api.postcodes.io/docs
A fully configured data source output section would look like this:
{ "name": "District", "path": "$.result.admin_district", "type": "string", "description": "The current district/unitary authority to which the postcode has been assigned."},Configure the remaining sections
Section titled “Configure the remaining sections”The datasource is available on the internet so we do not need to use the back-end proxy. The outputs we have configured are compatible with a table and a multi-value components;
"useProxy": false,"compatibleWith": [ "table", "multivalue"]Save the data source template by clicking the Update button at the bottom of the form:

6.1.5 Challenge — improving the data source to handle partial postcodes
Section titled “6.1.5 Challenge — improving the data source to handle partial postcodes”The postcodes api has a query method that will return results for partial postcodes:
https://api.postcodes.io/postcodes?q=[query]
Have a go at modifying the data source to support this.
Examples of how to modify the inputs and outputs
Section titled “Examples of how to modify the inputs and outputs”The inputs section does not change but the url becomes:
"url": "https://api.postcodes.io/postcodes?q={{postcode}}",The path in the outputs must be updated to include the * to identify each result in the returned array
"path": "$.result.*.postcode",6.2 Flight Radar 24 Datasource
Section titled “6.2 Flight Radar 24 Datasource”This data source accesses publicly available flight data from FlightRadar24.
Access Ingenuity Hub by clicking on your user in the bottom left corner and selecting “Ingenuity Hub”
Go to the “Datasource templates” tab and click the [Add datasource template] button:
6.2.1 Enter the metadata
Section titled “6.2.1 Enter the metadata”Enter the following data:
Name: FlightRadar24
nameID: flightradar24
Description: Use the docs from the API to put together a useful description for users: https://fr24api.flightradar24.com/docs/getting-started
Search the web for a FlightRadar24 logo and upload it.
6.2.2 Configure the data source
Section titled “6.2.2 Configure the data source”The URL of the API is: https://api.flightradar24.com/common/v1/airport.json
The request is a standard “GET” request where the parameters are appended to the end of the request, i.e.
<api>?parametersTherefore, the first two lines of the datasource are:
"url": "https://api.flightradar24.com/common/v1/airport.json","type": "GET",Before we can test the data source we may need to force it to use the Proxy service (i.e. be sent from the back-end server rather than the users machine) and we may as well take the time to also configure the “compatibleWith” parameters. Configure the following parameters;
"useProxy": false,"compatibleWith": [ "table"]if there are any cross site scripting limitations or users machines do not have access to the data source. Configure the useProxy as “true”
6.2.3 Configure the inputs
Section titled “6.2.3 Configure the inputs”There are three inputs;
code: Required - The IATA or ICAO code for the airport
format: optional json or csv
limit: optional the maximum number of records returned
Therefore the inputs section of the data source is configured as follows:
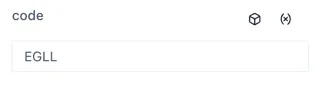
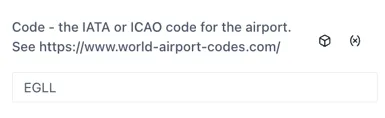
"inputs": [ { "name": "code", "type": "get", "label": "Code - the IATA or ICAO code for the airport. See https://www.world-airport-codes.com/", "description": "IATA codes are three-letter identifiers used in ticketing and passenger systems, while ICAO codes are four-letter identifiers used by air traffic control" }, { "name": "format", "type": "get", "default": "json", "label": "Optional. The format of the dataset to return", "description": "The format of the dataset to return" }, { "name": "limit", "type": "get", "default": 10 }]When no “label” property is set, the input field will show the name:
Setting the “label” property helps users and makes the data source easier to use:
Configuring the outputs
Section titled “Configuring the outputs”The outputs are configured in the output section and as a minimum require a “name” and “path”.
"output": { "paths": []}The path is the json path expression to extract the data from the API response
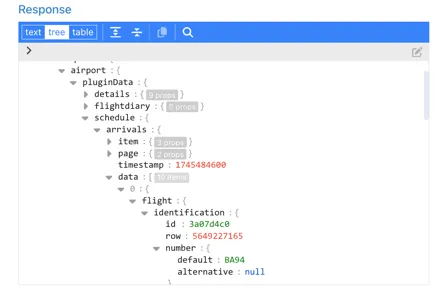
With the inputs set, we can now use the Test button at the in the Preview section to check the response from the API. Enter an airport code (e.g. LHR) and click Test. You should see the following in the Response window:
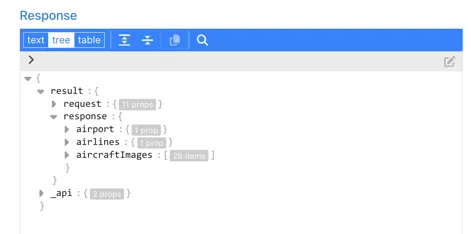
Explore the response to find the data you would like. For the purpose of this example, we are going to use the data in the $.result.response.airport.plugindata section:
Configure the outputs you would like to return.
To make it easy for users, all the outputs are prefixed with Arrival or Departure so that they are grouped in the dropdown selection. This makes it easy for users to find the right field.
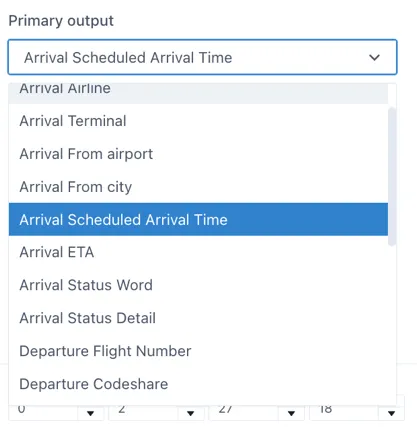
For the purpose of this exercise, we will look at the configuration of 2 examples as this covers the two data types needed:
-
Arrival Flight Number
-
Arrival Scheduled Arrival Time
Arrival Flight Number
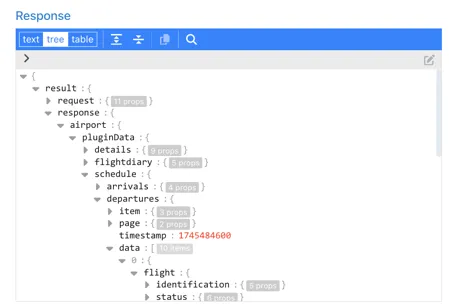
Section titled “Arrival Flight Number”The flight number of arriving flights is found under the ..schedule.arrivals.data.0.flight.identification.id
To return all of the records as an object we replace the “0” with ”*”, so the configuration is as follows:
{ "name": "Arrival Flight Number", "path": "$.result.response.airport.pluginData.schedule.arrivals.data.*.flight.identification.number.default", "description": "The commercial flight number, typically assigned by the airline."}Arrival Scheduled Arrival Time
Section titled “Arrival Scheduled Arrival Time”The scheduled arrival time is also in the “flight” section of the response under ..time.scheduled.arrival:
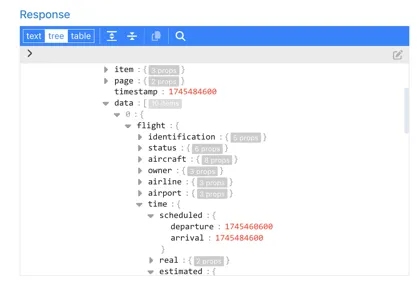
The format is a Unix Epoch Timestamp — a 10-digit number representing the seconds since 01 Jan 1970 UTC. There is no timezone information in the timestamp ( although the timezone of the airport is available in the ..airport.plugindata.details.timezone section of the response)
To make sure that UI components can use this as a true date object, rather than a string, we will specify the data type and format as part of the output:
The matching format code for this format from date-fns.org (https://date-fns.org/v4.1.0/docs/format) is “t”.
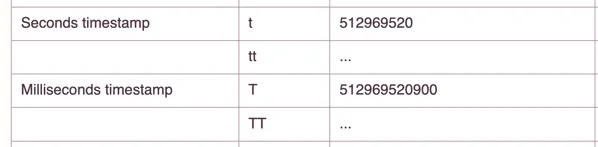
The configuration of the output is:
"name": "Arrival Scheduled Arrival Time","path":"$.result.response.airport.pluginData.schedule.arrivals.data.*.flight.time.scheduled.arrival","format": { "type": "date", "pattern": "t"},Add configuration for any other Arrivals and Departure fields you would like to make available to users.
Save the data source template by clicking the Update button at the bottom of the form:
6.3 Theme Parks data source
Section titled “6.3 Theme Parks data source”This data source connects to publicly available data on major theme parks and their queue times.
Access Ingenuity Hub by clicking on your user in the bottom left corner and selecting “Ingenuity Hub”
Go to the “Datasource templates” tab and click the [Add datasource template] button:
6.3.1 Enter the metadata
Section titled “6.3.1 Enter the metadata”Enter the following data:
Name: Theme Parks
nameID: theme-parks
Description: Use the docs from the API to put together a useful description for users: https://queue-times.com/pages/about
Search the web for an appropriate logo and upload it.
6.3.2 Configure the source
Section titled “6.3.2 Configure the source”The URL of the API is: https://queue-times.com/parks.json
The request is a standard “GET”, therefore, the first two lines of the datasource are:
"url": "<https://queue-times.com/parks.json>","type": "GET",Configuring the other settings
Section titled “Configuring the other settings”Before we can test the data source we may need to force it to use the Proxy service (i.e. be sent from the back-end server rather than the users machine) if there are any cross site scripting limitiations or users machines do not have access to the data source. Configure the useProxy as follows, and we may as well take the time to also configure the “compatibleWith” parameters.
"useProxy": true,"compatibleWith": [ "table", "multivalue", "value"]6.3.3 Configure the inputs
Section titled “6.3.3 Configure the inputs”The URL does not accept any parameters but we would like to have the option to filter out the list of parks for a given company. So we will present the user with an optional input for the companyId and use a JSON path filter to create a custom output with the list we would like ;
companyId: Optional - The id of the company to filter the list of theme parks
Therefore the inputs section of the data source is configured as follows:
"inputs": [ { "name": "companyId", "label": "Company ID (leave blank to return all)", "description": "If null then all companies and parks will be returned" }],6.3.4 Configuring the outputs
Section titled “6.3.4 Configuring the outputs”The outputs are configured in the output section and as a minimum require a “name” and “path”.
"output": { "paths": []}The path is the json path expression to extract the data from the API response
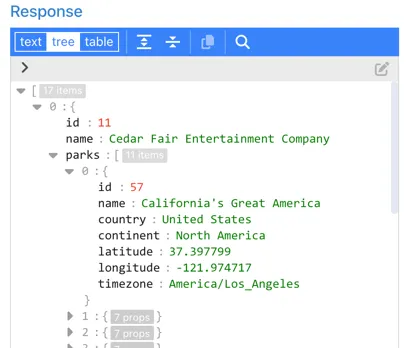
With the inputs set, we can now use the Test button at the in the Preview section to check the response from the API:
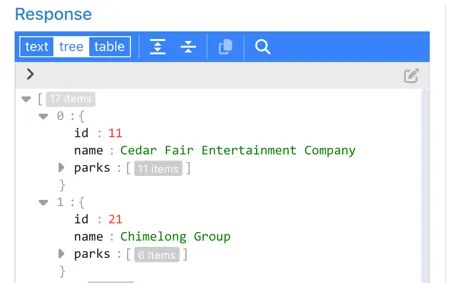
We can see that the list of parks is returned as a sub-document of each company the park details as a further set of sub-documents:
The Company output
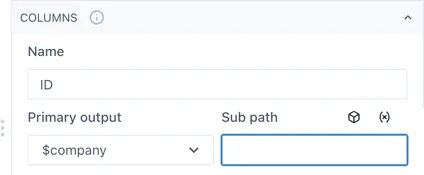
Section titled “The Company output”In this case we are going to return the whole json document for each company and let the user pick the property they want to display as a sub-path. So configure the first output as follows:
"output": { "paths": [ { "name": "$company", "path": "$", "label": "Company [id,name]", "description": "List of all the Companies that have Theme Parks. Has .name and .id properties" }, ]}When a user selects this output in the UI, they will be prompted to enter the sub path (i.e. id or name)
The Parks output
Section titled “The Parks output”For the Parks output we would like to separate the Parks out into a separate field to make it more intuitive for users and so that all the details are available within 1 sub-path. To do this we need to filter the API response to those parks matching the “companyId” in the input, using a JSON path expression that finds all objects in the root array that have an id matching the specified companyId, and then returns the parks property from those objects.
"$[?(@.id==={{companyId}})].parks"-
$ - This represents the root of the JSON document
-
[ ] - Square brackets indicate an array of elements
-
? - signifies the beginning of a filter expression
-
() - round brackets contain the filter expression
-
@ - represents the current object being processed in the filter.
-
@.id==={{companyId}} - elects elements where the id property equals the value of {{companyId}}
-
.parks - After filtering, this selects the parks property from each matched element
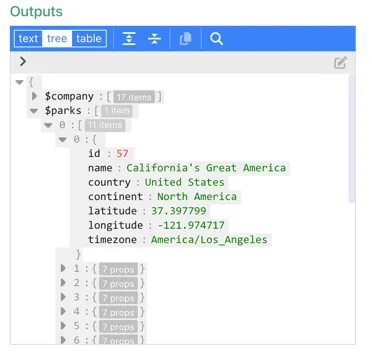
The $parks output is therefore configured as follows:
{ "name": "$parks", "path": "$[?(@.id==={{companyId}})].parks", "label": "Parks", "description": "List of all the parks for the selected company"}Now re-check the output by entering a Company ID and you should see something like the following:
Configure the other settings
Section titled “Configure the other settings”The datasource is available on the internet so we do not need to use the back-end proxy. The outputs we have configured are compatible with a table;
"useProxy": false,"compatibleWith": [ "table"]Save the data source template by clicking the Update button at the bottom of the form: